- MC/A/14
- Item
- c1896
Beaten lead mirror with peacock designs.
The mirror was almost certainly part of the furnishings of the Mackintoshes Southpark Avenue flat taken over by William Davidson when he purchased the flat.
MacNair, James Herbert
176 results with digital objects Show results with digital objects
Beaten lead mirror with peacock designs.
The mirror was almost certainly part of the furnishings of the Mackintoshes Southpark Avenue flat taken over by William Davidson when he purchased the flat.
MacNair, James Herbert
Part of Records of The Glasgow School of Art, Glasgow, Scotland
GSA Archives and Collections hold 216 audiovisual files, covering a range of topics and a wide date range. The audiovisual material has been created both by GSA and by external organisations, such as the BBC (television and radio), STV and ITV, other educational institutions and the Scottish Arts Council. Media in the collection include 16mm films, 35mm films, audio cassettes, audio CDs, CD Rom, DV cassette, DVD, Floppy disk, Reel to reel audios, Super 8 film, U-matic films, VHS tapes and Video 8 tapes. The audiovisual files pertain to topics including the GSA Fashion and Degree Shows, and Activities Week; students discussing their work; lectures by architects; presentations by, and interviews and conversations with, GSA alumni; centenary of the Mackintosh Building; Charles Rennie Mackintosh and Margaret Macdonald Mackintosh; plays; and documentaries on GSA. Please note that this material is not yet fully catalogued and therefore some items may not be accessible to researchers. As at August 2017, only the fashion show audiovisual material has been catalogued. The remaining uncatalogued material is therefore not currently accessible for researchers.
Webster, Chris
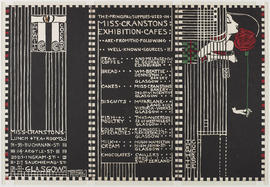
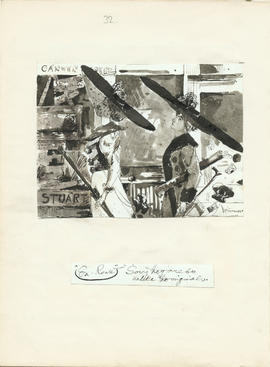
Menu for Miss Cranston's exhibition cafe, The White Cockade
The design lists the principal suppliers used by Miss Cranston in her exhibition cafe. The right hand side of the design features a stylised female figure holding a red rose.
Mackintosh, Margaret Macdonald
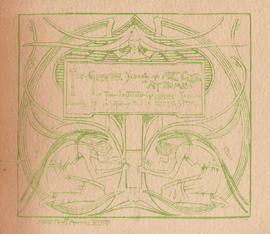
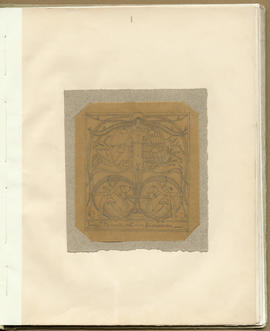
Design for a Glasgow School of Art Club 'Programme'
Featuring two seated, semi-clothed female figures integrated amongst swirling plant forms.
Mackintosh, Margaret Macdonald
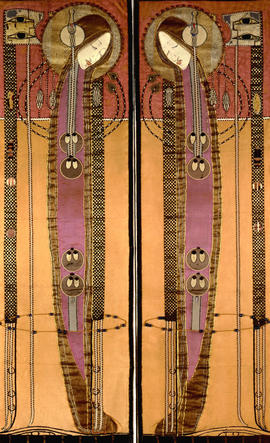
Similar panels appear in Mackintosh's drawings of the east wall of the principal bedroom at The Hill House although it is not certain when they were installed there as early photographs taken in 1904 do not show them. The panels appear to be duplicates of those shown at the Vienna Secession exhibition in 1900 and bought by Emil Blumenfelt; at least one of these (listed as a 'bed curtain') was lent by Blumenfelt to the Turin exhibition in 1902 - although it lacks the lower section of black silk seen on The Hill House panels.
Mackintosh, Margaret Macdonald
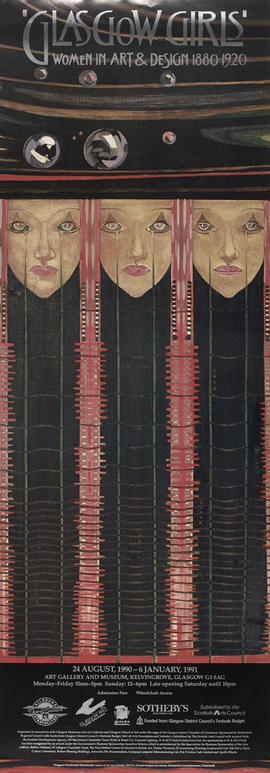
Poster for exhibition ''Glasgow Girls' Women in Art & Design 1880-1920', Glasgow
Part of Records of The Glasgow School of Art, Glasgow, Scotland
Poster for exhibition ''Glasgow Girls' Women in Art & Design 1880-1920', Art Gallery and Museum, Kelvingrove, Glasgow, 24 Aug 1990-06 Jan 1991. The poster features an image of Margaret Macdonald Mackintosh's artwork Opera of the Seas.
Not available / given
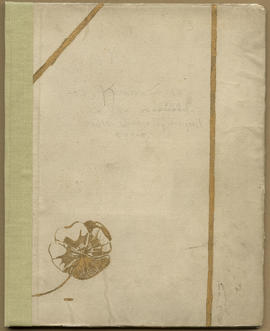
The Magazine: Volume 1 (Page 1)
The Magazine: Volume 1 (Page 2)
The Magazine: Volume 1 (Page 3)
The Magazine: Volume 1 (Page 4)
The Magazine: Volume 1 (Page 5)
The Magazine: Volume 1 (Page 6)
The Magazine: Volume 1 (Page 7)
The Magazine: Volume 1 (Page 8)
The Magazine: Volume 1 (Page 9)
The Magazine: Volume 1 (Page 10)
The Magazine: Volume 1 (Page 11)
The Magazine: Volume 1 (Page 12)
The Magazine: Volume 1 (Page 13)

The Magazine: Volume 1 (Page 14)
The Magazine: Volume 1 (Page 15)
The Magazine: Volume 1 (Page 16)

The Magazine: Volume 1 (Page 17)
The Magazine: Volume 1 (Page 18)
The Magazine: Volume 1 (Page 19)
The Magazine: Volume 1 (Page 20)
The Magazine: Volume 1 (Page 21)
The Magazine: Volume 1 (Page 22)
The Magazine: Volume 1 (Page 23)
The Magazine: Volume 1 (Page 24)
The Magazine: Volume 1 (Page 25)
The Magazine: Volume 1 (Page 26)
The Magazine: Volume 1 (Page 27)
The Magazine: Volume 1 (Page 28)
The Magazine: Volume 1 (Page 29)
The Magazine: Volume 1 (Page 30)
The Magazine: Volume 1 (Page 31)

The Magazine: Volume 1 (Page 32)
The Magazine: Volume 1 (Page 33)
The Magazine: Volume 1 (Page 34)
The Magazine: Volume 1 (Page 35)
The Magazine: Volume 1 (Page 36)
The Magazine: Volume 1 (Page 37)
The Magazine: Volume 1 (Page 38)
The Magazine: Volume 1 (Page 39)
The Magazine: Volume 1 (Page 40)
The Magazine: Volume 2 (Page 1)