
The Magazine: Volume 3 (Page 4)
- MC/A/15/3/p4
- Part
- Nov 1894
The Magazine: Volume 3 (Page 4)
The Magazine: Volume 3 (Page 5)

The Magazine: Volume 3 (Page 6)

The Magazine: Volume 3 (Page 3)
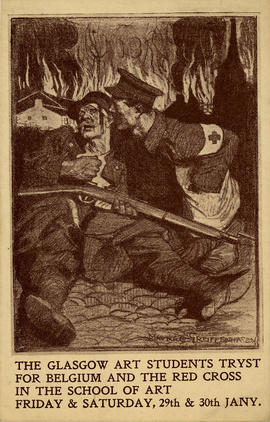
Card for The Glasgow Art Students Tryst
Part of Papers of Archibald Haswell Miller and Josephine Haswell Miller (nee Cameron)
Two copies of the card for The Glasgow Art Students Tryst for Belgium and the Red Cross dating to the 29th and 30th of January.
Greiffenhagen, Maurice
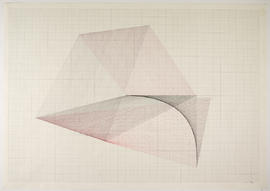
Parabola type design in red and black ink on graph paper created by GSA student Tim Pulleyn who won the Hutchison Prize for Fine Art in 2010.
Pulleyn, Tim
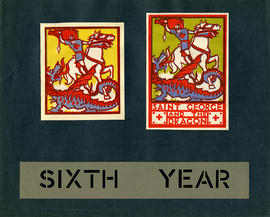
Woodcut prints depicting the St George myth
Part of Material relating to Gerard V Murphy, former GSA student
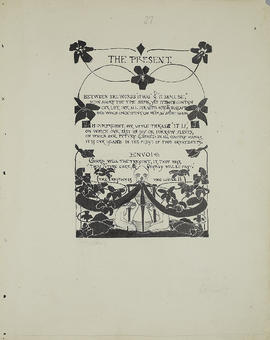
Two multicolour-printed pieces of teaching examples for printmaking, attached to backing paper. These prints illustrate the heroic myth of Saint George slaying a dragon. Also used as teaching materials in schools in Scotland, as marked with the level of students "Sixth year."
Murphy, Gerard V
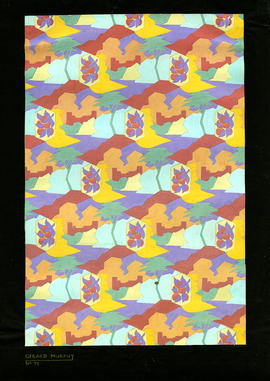
Part of Material relating to Gerard V Murphy, former GSA student
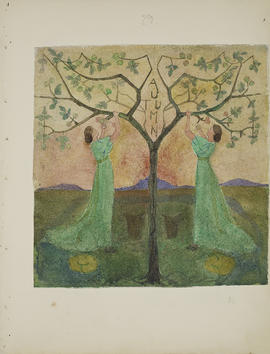
A multi-coloured oblique pattern design with fruits and trees repeatedly intersected. Includes annotations of student registration no. ("No. 71") and signed "Gerard Murphy."
Murphy, Gerard V
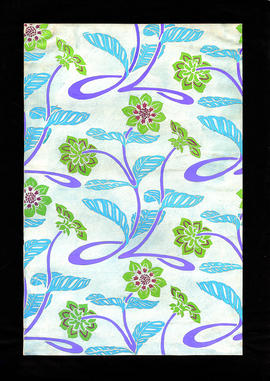
Part of Material relating to Gerard V Murphy, former GSA student
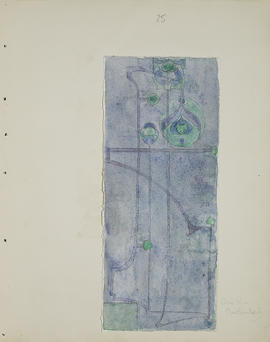
A pattern design featuring a repeating motif of plants with purple-coloured stems, blue-toned leaves, and green petals.
Murphy, Gerard V
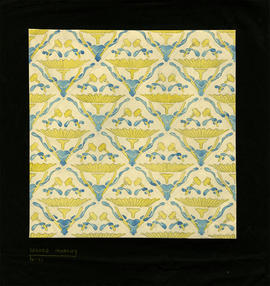
Part of Material relating to Gerard V Murphy, former GSA student
A diamond shaped organic pattern design. Includes annotations of student registration no. ("No. 71") and signed "Gerard Murphy."
Murphy, Gerard V
The Magazine: Volume 3 (Page 70)

The Magazine: Volume 3 (Page 69)

The Magazine: Volume 3 (Page 68)

The Magazine: Volume 3 (Page 67)

The Magazine: Volume 3 (Page 66)
The Magazine: Volume 3 (Page 65)

The Magazine: Volume 3 (Page 64)
The Magazine: Volume 3 (Page 63)
The Magazine: Volume 3 (Page 62)
The Magazine: Volume 3 (Page 61)
The Magazine: Volume 3 (Page 60)
The Magazine: Volume 3 (Page 59)
The Magazine: Volume 3 (Page 58)
The Magazine: Volume 3 (Page 57)

The Magazine: Volume 3 (Page 56)
The Magazine: Volume 3 (Page 55)
The Magazine: Volume 3 (Page 54)
The Magazine: Volume 3 (Page 53)
The Magazine: Volume 3 (Page 52)
The Magazine: Volume 3 (Page 51)
The Magazine: Volume 3 (Page 50)
The Magazine: Volume 3 (Page 49)

The Magazine: Volume 3 (Page 48)
The Magazine: Volume 3 (Page 47)
The Magazine: Volume 3 (Page 46)
The Magazine: Volume 3 (Page 45)
The Magazine: Volume 3 (Page 44)
The Magazine: Volume 3 (Page 43)
The Magazine: Volume 3 (Page 42)

The Magazine: Volume 3 (Page 41)
The Magazine: Volume 3 (Page 40)
The Magazine: Volume 3 (Page 39)
The Magazine: Volume 3 (Page 38)
The Magazine: Volume 3 (Page 37)
The Magazine: Volume 3 (Page 36)
The Magazine: Volume 3 (Page 35)

The Magazine: Volume 3 (Page 34)
The Magazine: Volume 3 (Page 33)
The Magazine: Volume 3 (Page 32)
The Magazine: Volume 3 (Page 31)