
The Magazine: Volume 3 (Page 9)
The Magazine: Volume 3 (Page 10)
The Magazine: Volume 3 (Page 11)
The Magazine: Volume 3 (Page 12)
The Magazine: Volume 3 (Page 18)
The Magazine: Volume 3 (Page 19)
The Magazine: Volume 3 (Page 21)

The Magazine: Volume 3 (Page 24)
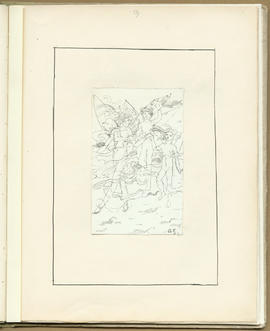
The Magazine: Volume 3 (Page 25)

The Magazine: Volume 3 (Page 30)
The Magazine: Volume 3 (Page 33)
The Magazine: Volume 3 (Page 37)
The Magazine: Volume 3 (Page 39)
The Magazine: Volume 3 (Page 47)
The Magazine: Volume 3 (Page 49)
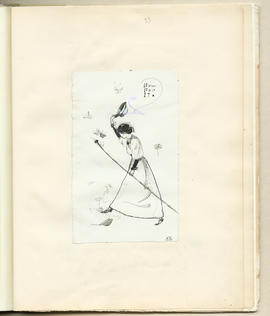
The Magazine: Volume 3 (Page 59)
The Magazine: Volume 3 (Page 67)

The Magazine: Volume 3 (Page 68)
The Magazine: Volume 2 (Page 3)
The Magazine: Volume 2 (Page 3)
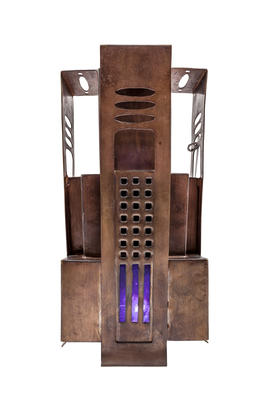
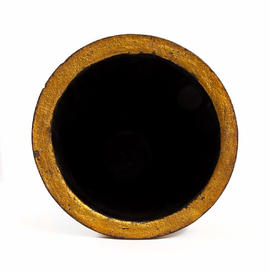
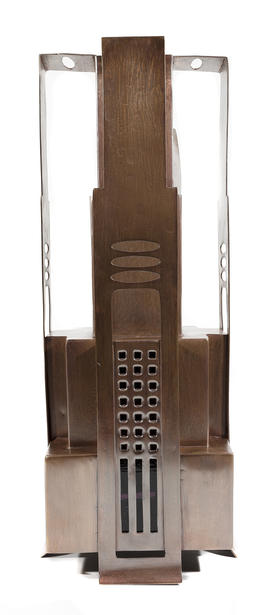
Lampshade for Library, Glasgow School of Art - Medium Canister (Version 1)
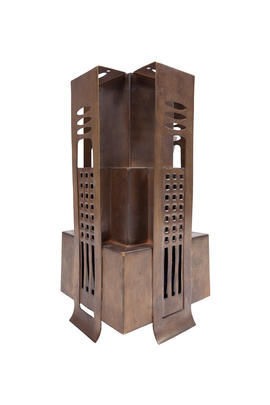
Lampshade for Library, Glasgow School of Art - Medium Canister (Version 3)
Lampshade for Library, Glasgow School of Art - Medium Canister (Version 5)
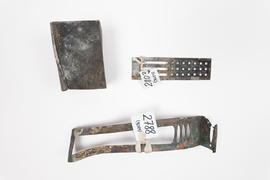
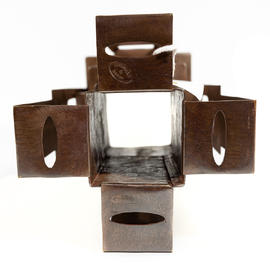
Fragments of lampshade(s) for Library, Glasgow School of Art (Version 1)
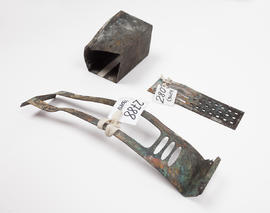
Fragments of lampshade(s) for Library, Glasgow School of Art (Version 3)
Coat of Arms for the stairwell at Glasgow School of Art (Version 6)
Coat of Arms for the stairwell at Glasgow School of Art (Version 8)

Writing desk for Gladsmuir (Version 4)
Writing desk for Gladsmuir (Version 7)
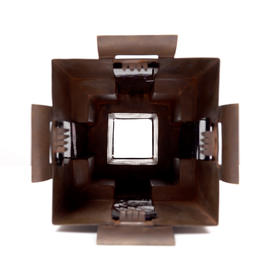
Lampshade for Library, Glasgow School of Art: Central Cluster- Reconstructed Small Canister (Version 4)
Lampshade for Library, Glasgow School of Art: Central Cluster- Reconstructed Small Canister (Version 6)
Lampshade for Library, Glasgow School of Art: Central Cluster- Composite Large Pendant (Version 1)
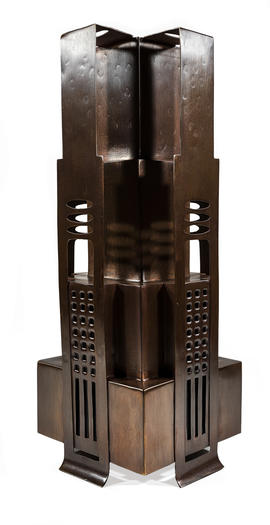
Lampshade for Library, Glasgow School of Art: Central Cluster- Composite Large Pendant (Version 2)
Lampshade for Library, Glasgow School of Art: Central Cluster- Composite Large Pendant (Version 6)

The Magazine: Volume 1 (Page 3)
The Magazine: Volume 1 (Page 7)
The Magazine: Volume 1 (Page 11)
The Magazine: Volume 1 (Page 13)

The Magazine: Volume 1 (Page 14)
The Magazine: Volume 1 (Page 19)
The Magazine: Volume 1 (Page 22)
The Magazine: Volume 1 (Page 25)
The Magazine: Volume 1 (Page 26)
The Magazine: Volume 1 (Page 28)
The Magazine: Volume 1 (Page 33)
The Magazine: Volume 1 (Page 40)
The Magazine: Volume 2 (Page 7)
The Magazine: Volume 2 (Page 10)
The Magazine: Volume 2 (Page 11)
The Magazine: Volume 2 (Page 14)
The Magazine: Volume 2 (Page 17)