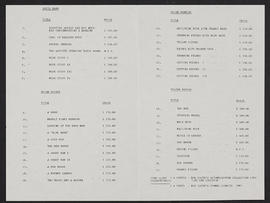
The Cloth at the Compass Gallery (Version 4)
- DC 089/3/3/100/v4
- Part
- 1985
Part of Textiles and papers of Fraser Taylor, GSA student and designer with The Cloth
The Cloth at the Compass Gallery (Version 4)
Part of Textiles and papers of Fraser Taylor, GSA student and designer with The Cloth
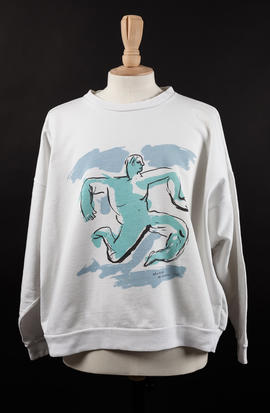
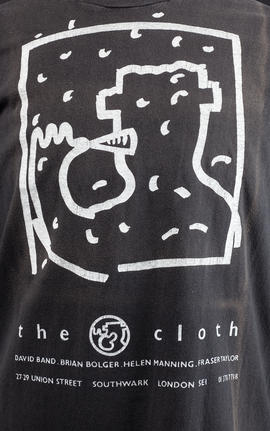
The Cloth for The Browns sweatshirt (Version 1)
Part of Textiles and papers of Fraser Taylor, GSA student and designer with The Cloth
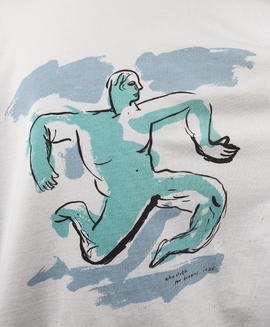
The Cloth for The Browns sweatshirt (Version 2)
Part of Textiles and papers of Fraser Taylor, GSA student and designer with The Cloth
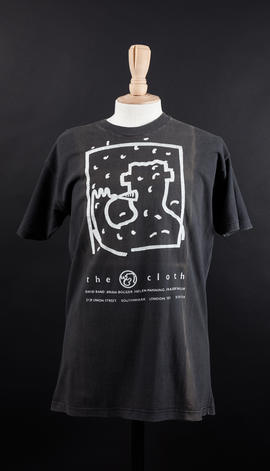
Part of Textiles and papers of Fraser Taylor, GSA student and designer with The Cloth
Part of Textiles and papers of Fraser Taylor, GSA student and designer with The Cloth
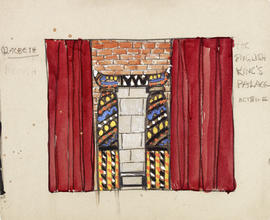
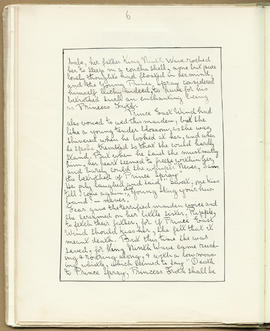
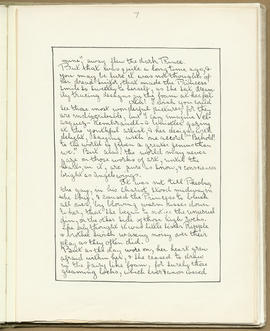
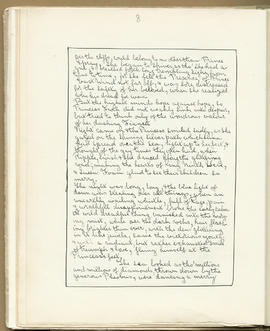
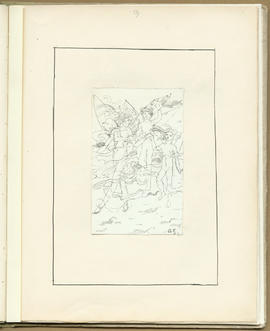
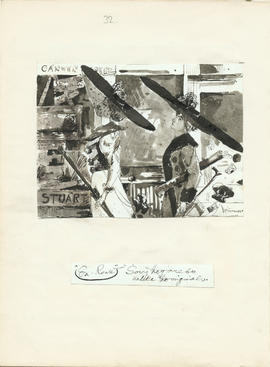
The English King's Palace. Sc III (from Macbeth)
Design for stage set - Shakespeare's Macbeth.
Smyth, Dorothy Carleton
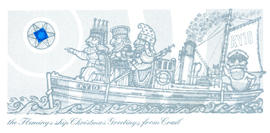
The Flemings Ship Christmas Greetings from Crail
Part of Papers of Conrad McKenna, student and staff member at The Glasgow School of Art, Scotland
Christmas greetings card with print of three kings travelling towards a star on a ship as the ship's captain looks on. Featuring message inside.
Fleming, John B
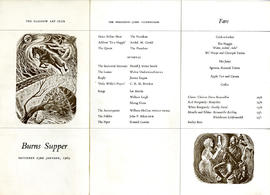
The Glasgow Art Club Burns Supper menu
Part of Papers of Conrad McKenna, student and staff member at The Glasgow School of Art, Scotland
Menu and schedule for the Burns Supper hosted by the Glasgow Art Club. Includes two woodcut prints.
*Not available / given
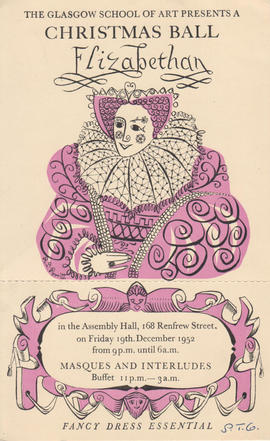
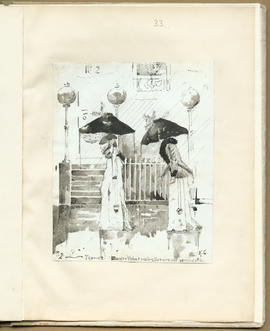
The Glasgow School of Art presents a Christmas Ball: Elizabethan
Part of Papers of Conrad McKenna, student and staff member at The Glasgow School of Art, Scotland
Flyer for fancy dress ball. Woman in Elizabethan dress.
Huntly, Gordon F
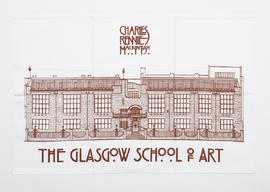
The Glasgow School of Art tea towel
Printed tea towel of The Glasgow School of Art with an image of the Mackintosh building, in red on white background. Tea towel is made of two pieces of fabric sewn together and then printed.
Chalmers, Sylvia
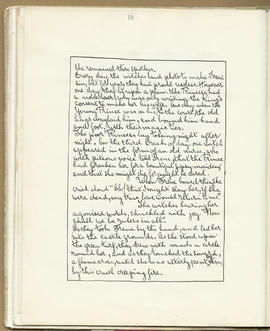
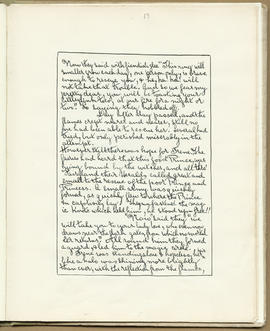
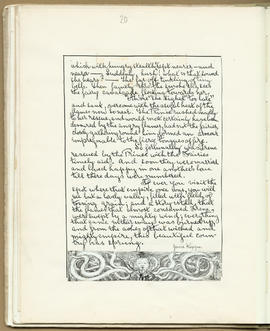
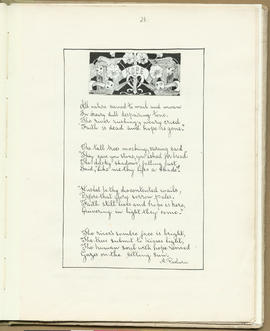
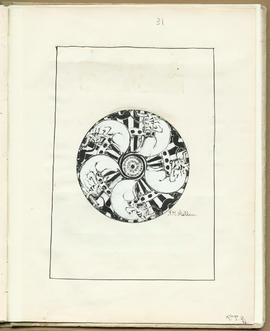
Sheets of decorative calligraphy.
Hunter, William R
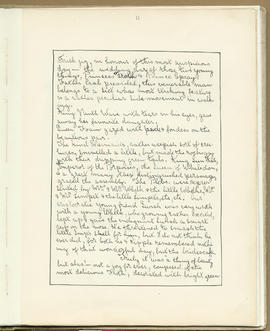
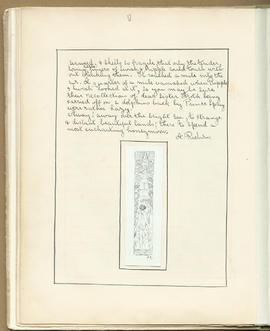
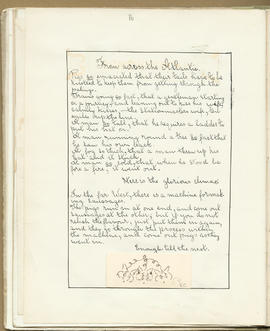
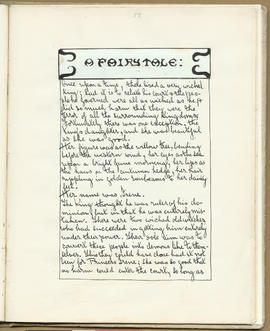
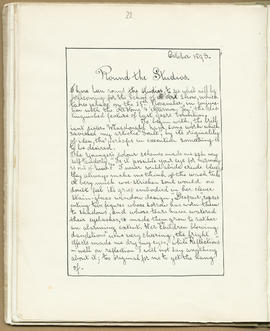
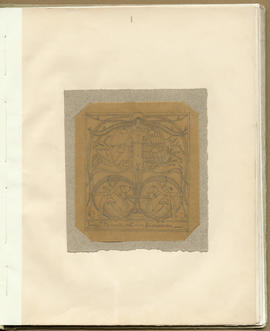
The Magazine: Volume 1 (Page 1)
The Magazine: Volume 1 (Page 10)
The Magazine: Volume 1 (Page 11)
The Magazine: Volume 1 (Page 12)
The Magazine: Volume 1 (Page 13)

The Magazine: Volume 1 (Page 14)
The Magazine: Volume 1 (Page 15)
The Magazine: Volume 1 (Page 16)

The Magazine: Volume 1 (Page 17)

The Magazine: Volume 1 (Page 18)

The Magazine: Volume 1 (Page 19)

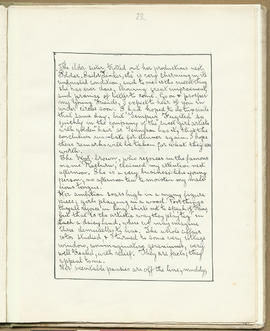
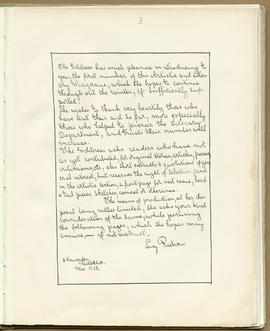
The Magazine: Volume 1 (Page 2)
The Magazine: Volume 1 (Page 20)
The Magazine: Volume 1 (Page 21)
The Magazine: Volume 1 (Page 22)
The Magazine: Volume 1 (Page 23)
The Magazine: Volume 1 (Page 24)
The Magazine: Volume 1 (Page 25)
The Magazine: Volume 1 (Page 26)
The Magazine: Volume 1 (Page 27)
The Magazine: Volume 1 (Page 28)
The Magazine: Volume 1 (Page 29)

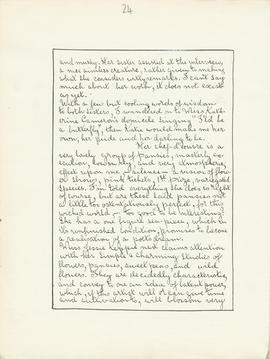
The Magazine: Volume 1 (Page 3)
The Magazine: Volume 1 (Page 30)
The Magazine: Volume 1 (Page 31)

The Magazine: Volume 1 (Page 32)
The Magazine: Volume 1 (Page 33)
The Magazine: Volume 1 (Page 34)
The Magazine: Volume 1 (Page 35)
The Magazine: Volume 1 (Page 36)
The Magazine: Volume 1 (Page 37)

The Magazine: Volume 1 (Page 38)

The Magazine: Volume 1 (Page 39)
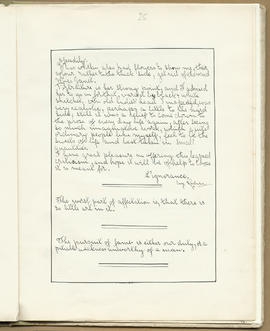
The Magazine: Volume 1 (Page 4)

The Magazine: Volume 1 (Page 40)
The Magazine: Volume 1 (Page 5)

The Magazine: Volume 1 (Page 6)
The Magazine: Volume 1 (Page 7)

The Magazine: Volume 1 (Page 8)