The Magazine: Volume 3 (Page 47)
The Magazine: Volume 3 (Page 49)
The Magazine: Volume 3 (Page 59)

The Magazine: Volume 3 (Page 67)

The Magazine: Volume 3 (Page 68)
The Magazine: Volume 2 (Page 3)
The Magazine: Volume 2 (Page 3)
The Magazine: Volume 1 (Page 1)
The Magazine: Volume 1 (Page 4)
The Magazine: Volume 1 (Page 15)
The Magazine: Volume 1 (Page 24)

The Magazine: Volume 1 (Page 32)
The Magazine: Volume 1 (Page 35)
The Magazine: Volume 2 (Page 1)
The Magazine: Volume 2 (Page 9)
The Magazine: Volume 2 (Page 12)

The Magazine: Volume 2 (Page 13)
The Magazine: Volume 2 (Page 16)
The Magazine: Volume 2 (Page 21)
The Magazine: Volume 2 (Page 24)
The Magazine: Volume 2 (Page 28)
The Magazine: Volume 2 (Page 38)
The Magazine: Volume 2 (Page 39)
The Magazine: Volume 2 (Page 43)
The Magazine: Volume 2 (Page 44)

The Magazine: Volume 2 (Page 47)
The Magazine: Volume 2 (Page 51)
The Magazine: Volume 2 (Page 53)
The Magazine: Volume 2 (Page 60)
The Magazine: Volume 2 (Page 64)

The Magazine: Volume 2 (Page 65)
The Magazine: Volume 3 (Page 1)
The Magazine: Volume 3 (Page 5)

The Magazine: Volume 3 (Page 16)
The Magazine: Volume 3 (Page 17)
The Magazine: Volume 3 (Page 23)
The Magazine: Volume 3 (Page 29)
The Magazine: Volume 3 (Page 31)
The Magazine: Volume 3 (Page 32)
The Magazine: Volume 3 (Page 34)
The Magazine: Volume 3 (Page 36)
The Magazine: Volume 3 (Page 42)
The Magazine: Volume 3 (Page 53)
The Magazine: Volume 3 (Page 54)
The Magazine: Volume 3 (Page 56)
The Magazine: Volume 3 (Page 60)
The Magazine: Volume 3 (Page 63)
Lampshade for Library, Glasgow School of Art - Medium Canister (Version 2)
Lampshade for Library, Glasgow School of Art - Medium Canister (Version 6)
Plate 8 Reception Room from Portfolio of Prints
Plate 8 Reception Room from Portfolio of Prints
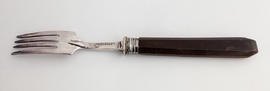
Dinner fork from Ingram Street Tea Rooms (Version 2)